How to Create 3D Text in Adobe After Effects
In this new tutorial we’re going to learn how to create 3D text animation from scratch in After Effects without plugins! The purpose of this tutorial is to demonstrate how to do the following:
How to Create a New Composition for 3D Text
How to Create Text and 3D Enable it
Add Depth
How to add creative lighting texture on top of text
How to Animate Camera Movement
The video version of the video is embedded just below, so if you prefer to watch how each step is done, you can play the video below. We’ve also included the video time-codes next to the section title so you can click to watch that step in the video.
But before we jump into the step by step, here is the sponsor for today’s tutorial: Dell. Dell the Gal team a brand new 40” UHD Curved Monitor! The extra wide space makes it easier to have multiple video software programs open at the same time and to have an extra long timeline in Adobe Premiere Pro. Watch here to learn more about this this Dell monitor.
Let’s begin our tutorial:
Create A New Composition (1:17)
To create New Composition, click on the new comp icon from the Project window. OR press Ctrl+N (Windows) or Cmd+N (Mac OS).
Choose your desired frame size for your animation. In our case, I’ll select 1920x1080 Full High Definition (FHD) at 30 fps.
From the Composition settings, select the 3D Renderer Tab and make sure you set renderer to Cinema 4D as we will be working in 3D.

Then set draft speed to quality 1 for a better playback on the rendered footage while building 3D text. (Increase render quality back in the end when you’re ready to export)
Create 3D Text (2:00)
Select the new Title tool icon, then click on the program window and type “3D” (this is our demonstrated text in this video) on screen. The font we use in this tutorial is called Monument Font.
3D Enable: Click on the box under comp for the 3D cube icon to enable 3D.
(Note: This won’t make it in 3D look, but it just means it will now move in 3D space)/After enabling 3D, click open the text layer. Under the Transform parameters, you’ll find the normal position, scale, rotation, and opacity controls that you normally see within After Effects or Premiere, but here you’ll also see new 3D controls : X Rotation, Y Rotation, Z Rotation.
Add Depth (3:12)
From the text layer, now you can toggle open the text layer and you’ll find Geometry Options underneath the Transform parameters. Under Geometry Option, increase the Extrusion Depth.
You can use move the Y Rotation around to see how the 3D extrusion affects the text, but remember that it’s still lacking texture and lighting so it doesn’t look finished. Before we add the texture and lighting we also need to create a camera layer.

Adding a new Camera (3:40)
To create a new Camera go to Layer > New > Camera. From the new dialogue box, use the default 35mm camera lens. After this is done, you will see a new Camera layer is generated. To move your camera, here are the shortcut keys.

Press “C” once to have the Orbit Tool. You can then click to rotate around our text.
Press “C” again to have a Pan Tool. You can then click to move up or down or side to side.
Then press “C” again to get the Dolly Tool. (to move in and out from the object).
Lighting & Shading (4:28)
Alright, here comes the creative part, adding lighting and shading to your 3D text.
With the Text Layer Selected, go up to the top menu. Go to Layer > New > Light
For the light type, choose spot light. You can use the settings seen in the screenshot below and also be sure to select “Cast Shadows” as this is an important for when we move the light to create depth.

You can then open up the Spot Light Layer and change the position of the light using the scale, X, Y , Z Rotation of the light.
Recommendation: Click on the 2-4 windows view to check on how exactly the light is at which angle casting onto the text. Also helps on positioning the light to the right place.
You can then watch the video to learn how you can create a few more lights and how to change the color of the lights.
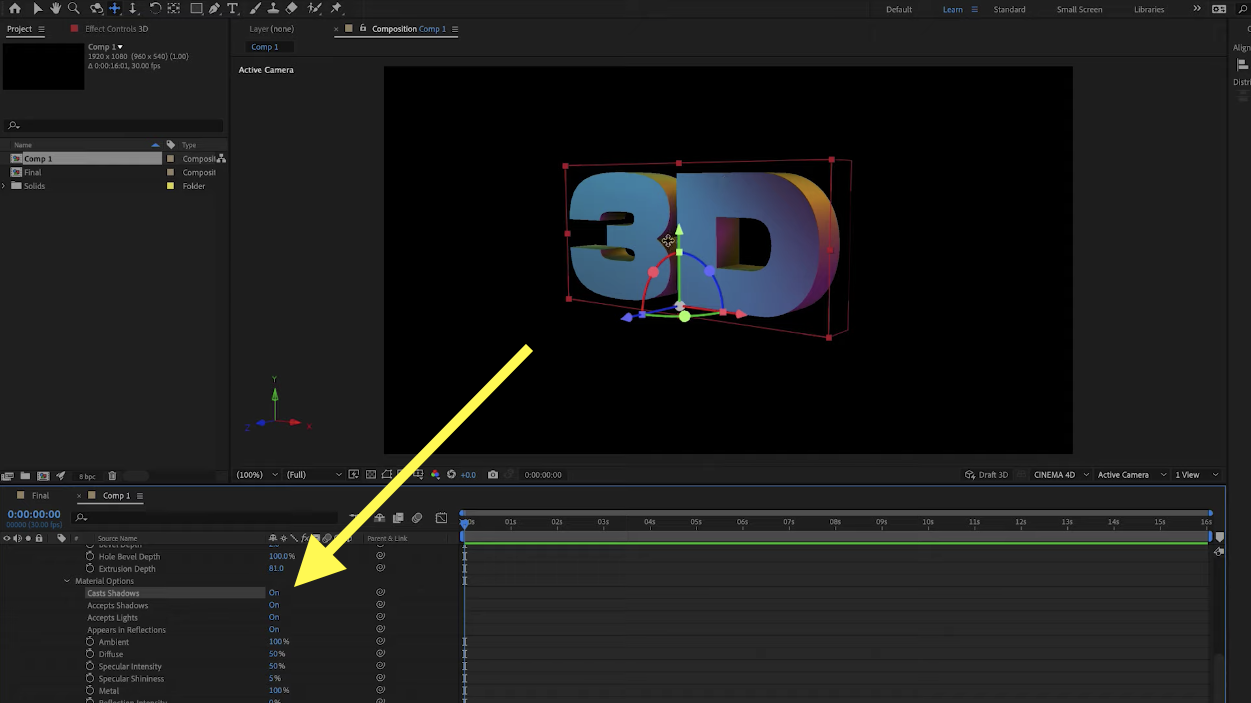
Cast Shadow & Bevel (9:06)
With your text layer selected, you can open up the text settings and scroll down and you’ll find Casts Shadows. Turn this on. Now you’ll see shadows reacting to the lights on the text!
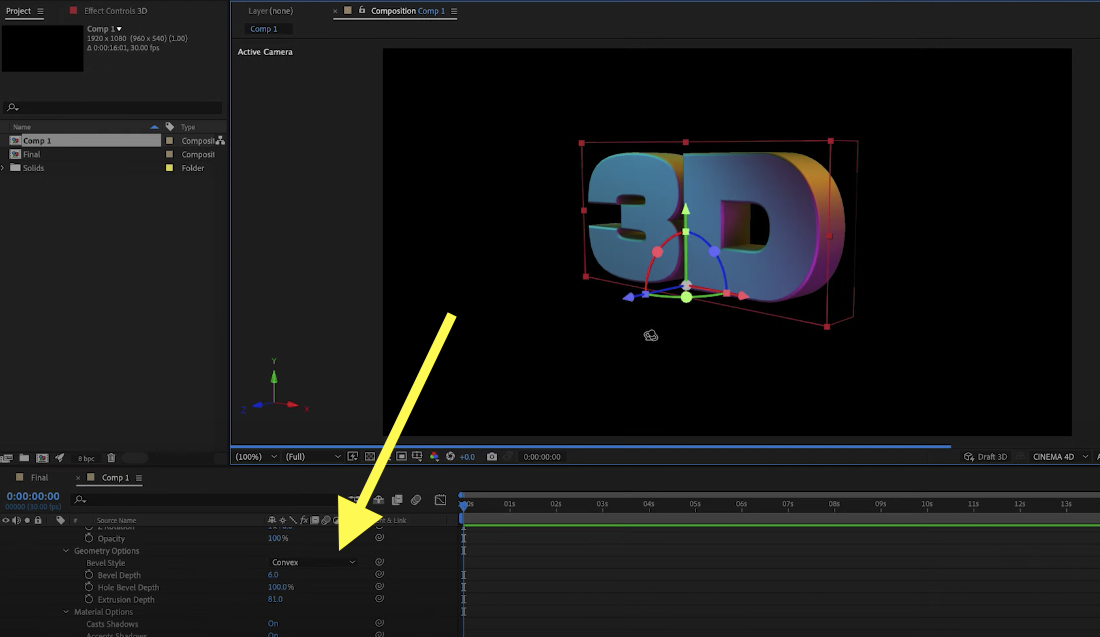
Next, you can scroll up to Geometry Options, and you’ll find Bevel Style and Bevel Depth. You can choose a Bevel Style and Increase the depth until you achieve your desired look (Gal picked Convex).
Camera Animation (10:05)
Creating your own 3D Camera Animation:
1. Move your playhead to the starting point in your timeline.
2. Press “C” for Orbit Tool, You can move the camera to the perspective underneath the text, for example. You can also use the Camera Pan and Dolly tool to get it set in the right starting place.
3. Once your starting place is set, create a “Key Frame” by pressing the the stopwatch next to Position parameter.
4. Let’s move ahead to where we want the animation to end. In this case we will move the playhead 4 seconds ahead.
5 Press “C” again and then use the Camera controls to move your camera to the new location. After you’ve set your new locations it will automatically create the end keyframe.
6. Go to your preview screen’s lower right corner to turn on the Draft 3D for a faster playback for rendering. When it is blue, it means it’s on.
7. Now we can render. Since we only need 4 seconds of footage, so press “N” to set the work area for just 4 seconds. Then hit spacebar to start rendering. And you are done!

That’s the end of the tutorial! Thank you so much, and hope it helps. If this video helps you, remember to smash the like button, and subscribe to Premiere Gal’s YouTube channel for more tutorial content.