Fast & Free Hologram Effect in Adobe After Effects
Your world is not flat!
Every day we follow routines and keep to our schedules. This can be good and productive; even predictable. To balance out the routine, creators create a world that is full of color, dimension, and nuance. Creators don’t just see the world in front of them, they create art, inspiration, and contribute to the creative growth of others.
In the spirit of inspiration and creative growth, here’s a quick overview on the hologram script effect as seen in the PremiereGal YouTube video “Free Hologram Effect In Adobe After Effects.”
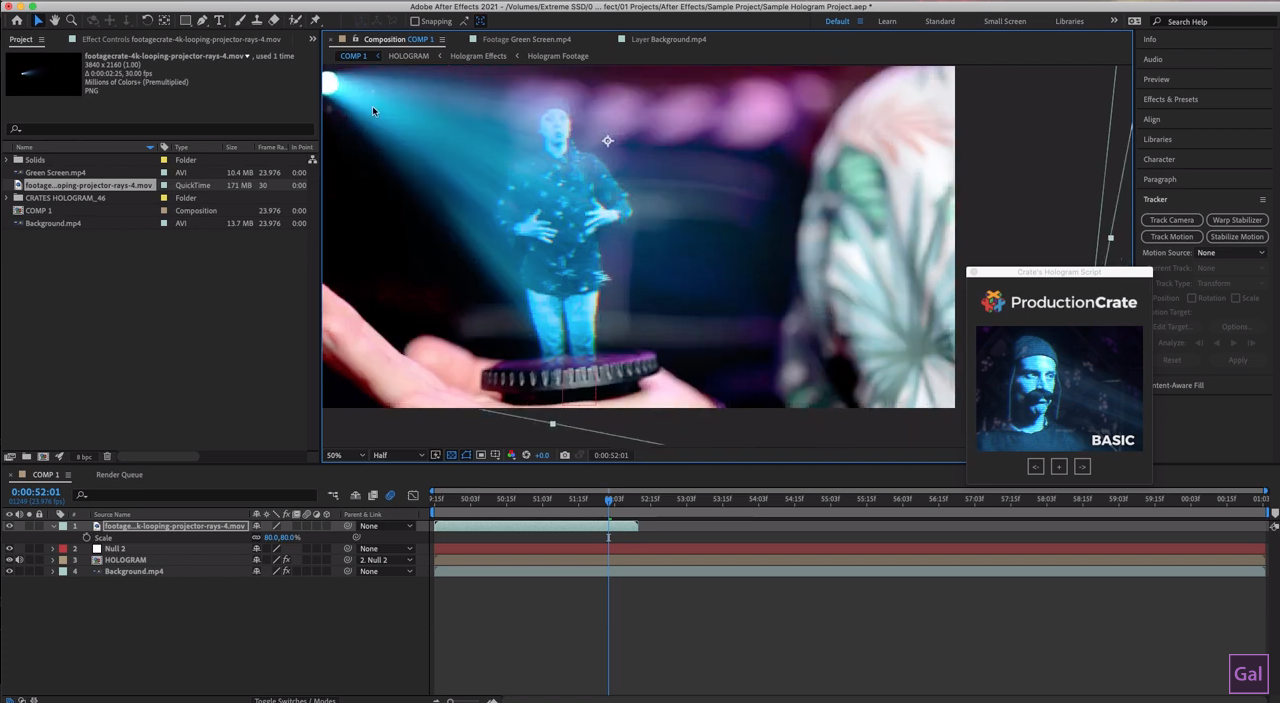
The Hologram script was created by ProductionCrate, and can be downloaded for free. When you download the script, all you have to do is run it, make a few modifications, and ProductionCrate will auto generate everything you need to have an awesome looking hologram.
Every Journey Begins With A First Step
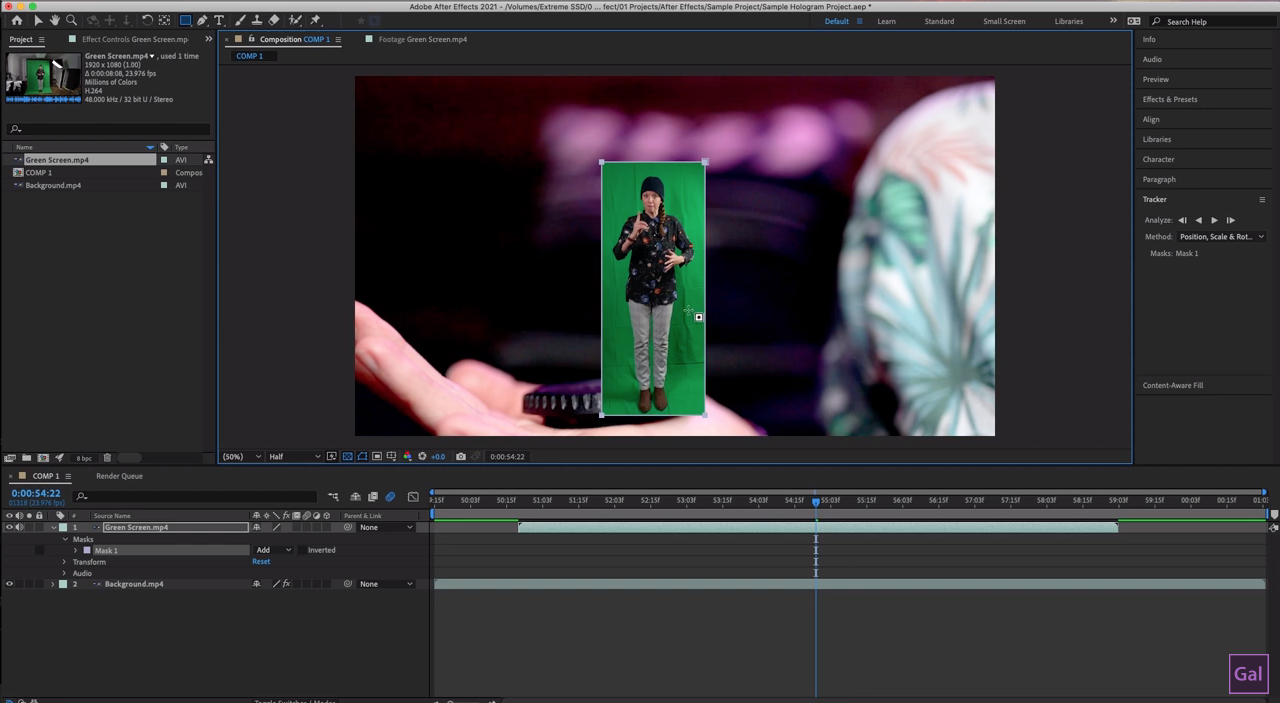
To begin your customized hologram, the first thing you want to do is remove your green screen from the desired clip. In After Effects, make sure that your screen screen clip is on top of your background layer. To remove the green screen, draw a mask around the subject as this will help to isolate the area that you will be working with.
Next you will go to effects and search for the keylight effect. Drag and drop the keylight effect onto your green screen clip. Go to effect controls and use the color dropper to select the green area.
*Pro Tip: Use View Mode Screen matte and toggle open the controls. Adjust the black and white clipping to ensure that the black and white areas of the mask do not have any grey in them. When you’re at a good balance, the foreground should be completely white (opaque) and the background should be completely black (transparent).

After your subject is separated from the background, you’re now free to rotate your subject if necessary and customize. To Rotate a subject, you can use the short key “R” to rotate. If you need to scale up your object, you can also use the short key “s”. To customize further and create a hovering look, you can create another mask on top of the first mask that was created. Change the mask type to “intersect” and toggle open the mask controls in the effect controls panel. If you adjust the feather of the mask, you will achieve a floating or hovering look.
Putting your creativity into motion
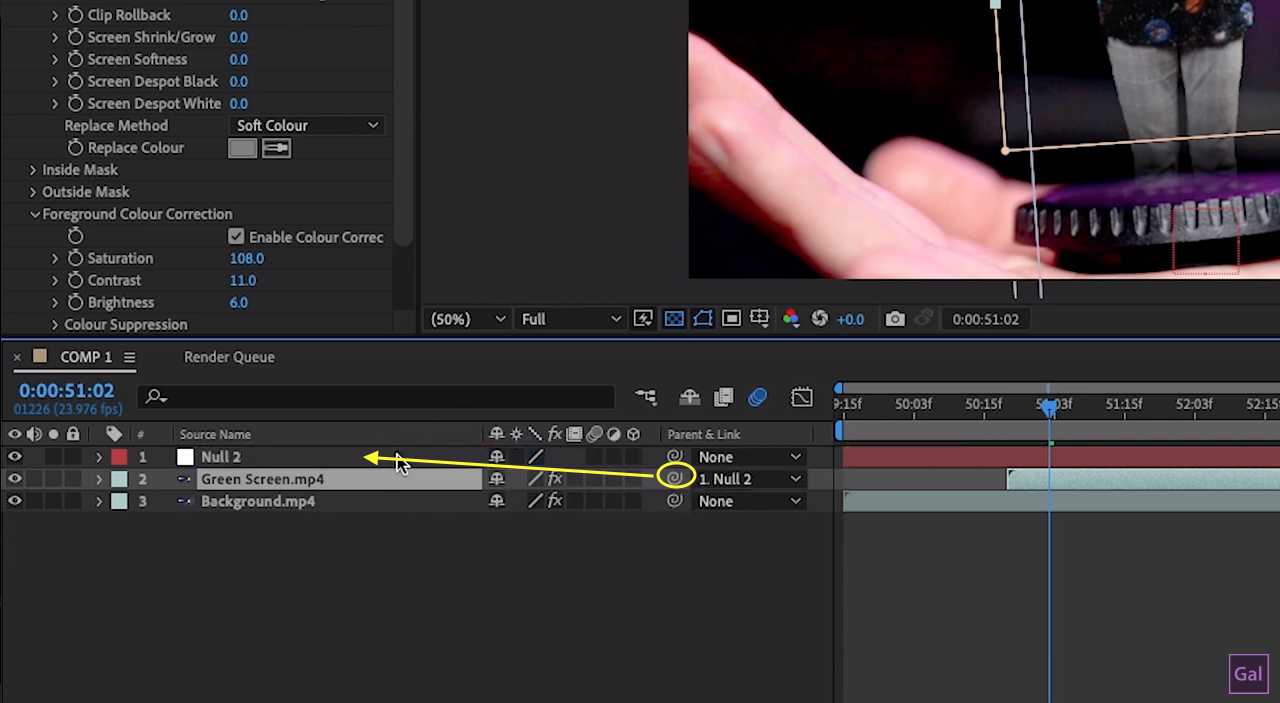
With motion tracking, you can make sure that your hologram stays in place or moves along with any particular movement that it should follow. To get started with motion tracking, be sure that you always start with your playhead at the beginning of the timeline.
Next, go to the Tracker panel and then select your background layer. Click on Track Motion and when the target comes up, move your target to a high contrast point. Your next step will be to create a null object as this will hold all of the tracking data for you. To create the null object, go to Layer>New>Null Object. Now that your Null Object layer is created, drag it to the top of your layers. Once again, go to Edit Target and set your Null object layer to be the tracker of the data. Press play to analyze the motion and stop when you are ready for the tracking to end. Lastly you will click on and drag the pick whip (the icon resembling an @ symbol) to your null layer to enable the null layer to become the tracker of the data.
Running the Hologram Script
To run the script, follow this path:
File > Script > Run Script File. Click on the Downloaded Script file in your downloads or designated folder, then choose your desired script from the pop-up window and the script will then precompose all of the hard work for you. *Note that when you apply the hologram script to your Composition, you will need to redirect your pick whip once more to the null layer.
Once you have your hologram up and running, you can customize settings such as scan lines, displacement, color and even project rays. As you see here, the rays that are projected onto the object can be moved so that they appear to be projecting from a light source or even below to give depth to your hologram design. You can also download a projection loop from a third party or locate a free one via ProductionCrate.
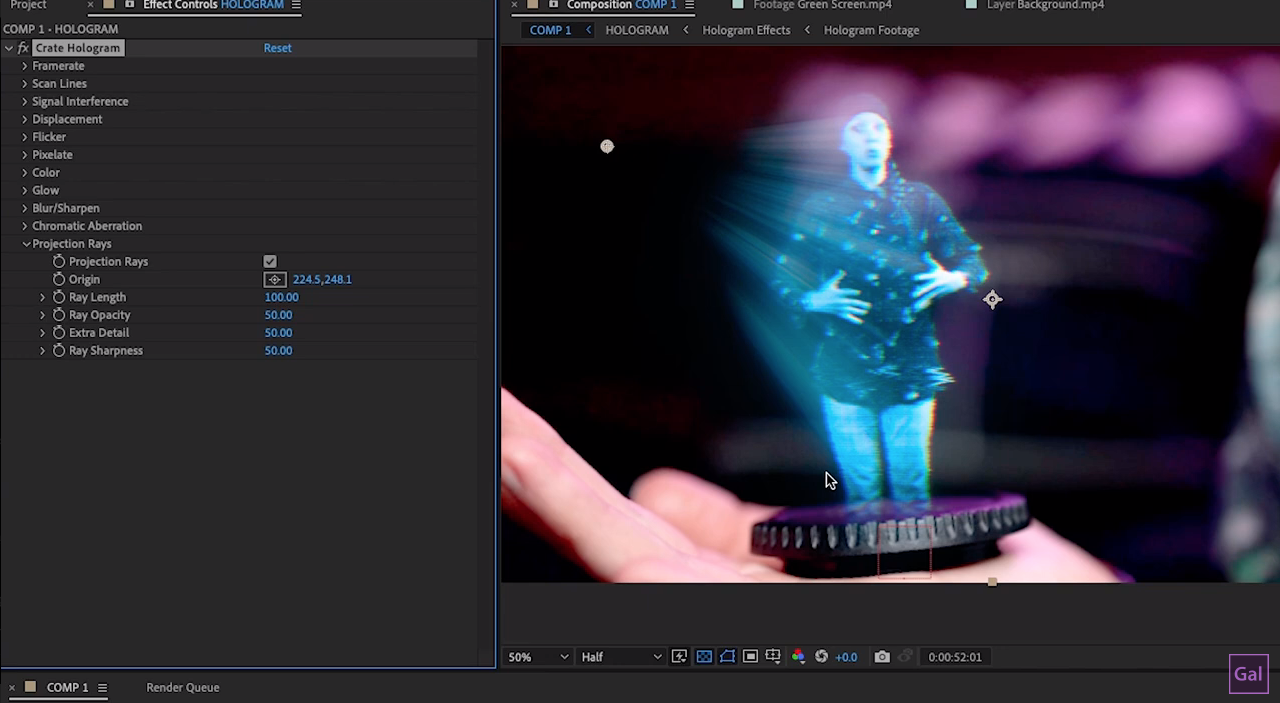
Interested in creating a cool on/off hologram effect? Do this by creating keyframes and adjust opacity at time points where you want the hologram to appear and disappear. To take it a little further and elevate your effects, check out the effect called CC Twister. When applying to your clip, you can create a twist for your hologram and it will appear as though the hologram is twisting into view or out of view.
We’ve Got Picture, How About Sound
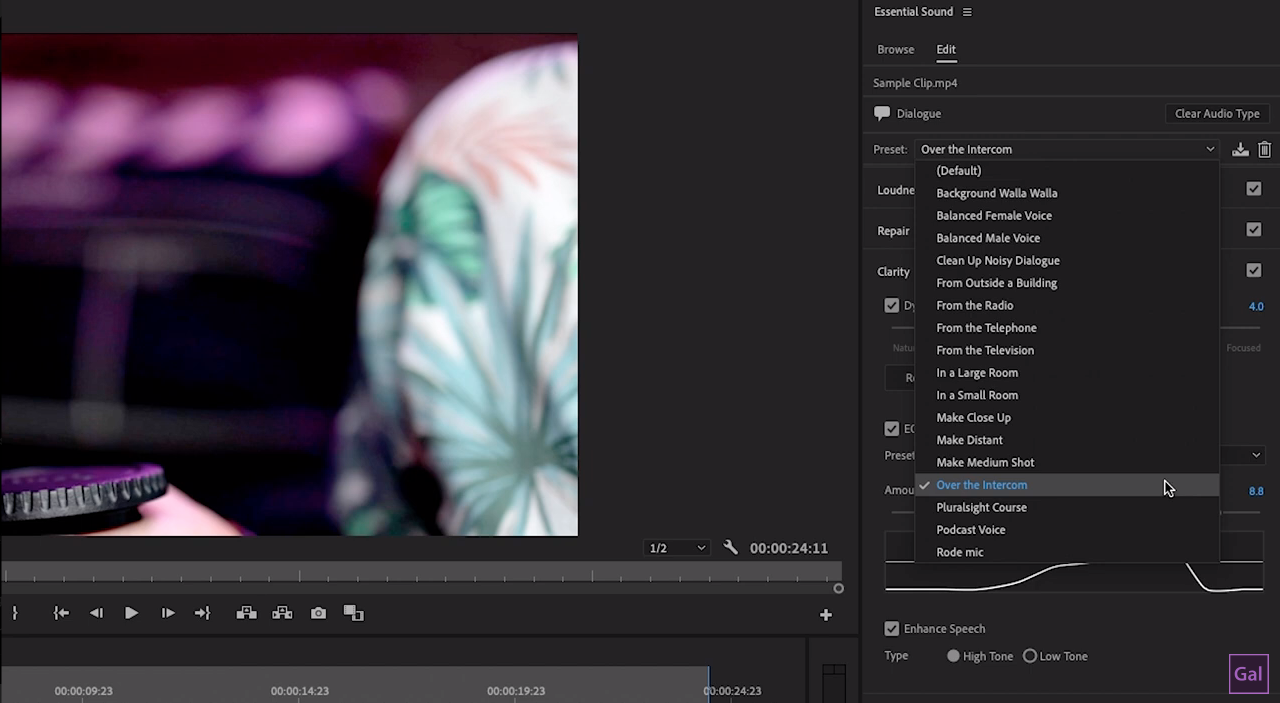
You can download and use sound effects in Premiere Pro to create the right sound for your hologram and then combine this with a special preset from the essential sound panel. In our example, we selected our voice dialogue clip and applied an “Over the Intercom” preset. Take a look around and explore the presets.
As you have read, this Hologram script created by ProductionCrate looks great and is simple to use to create holograms. If you’re looking for a way to customize holograms and push the creative envelope, well look no further. Be sure to check out the full length tutorial by Premiere Gal on YouTube.com/PremiereGal.
As always, stay safe & stay creative!